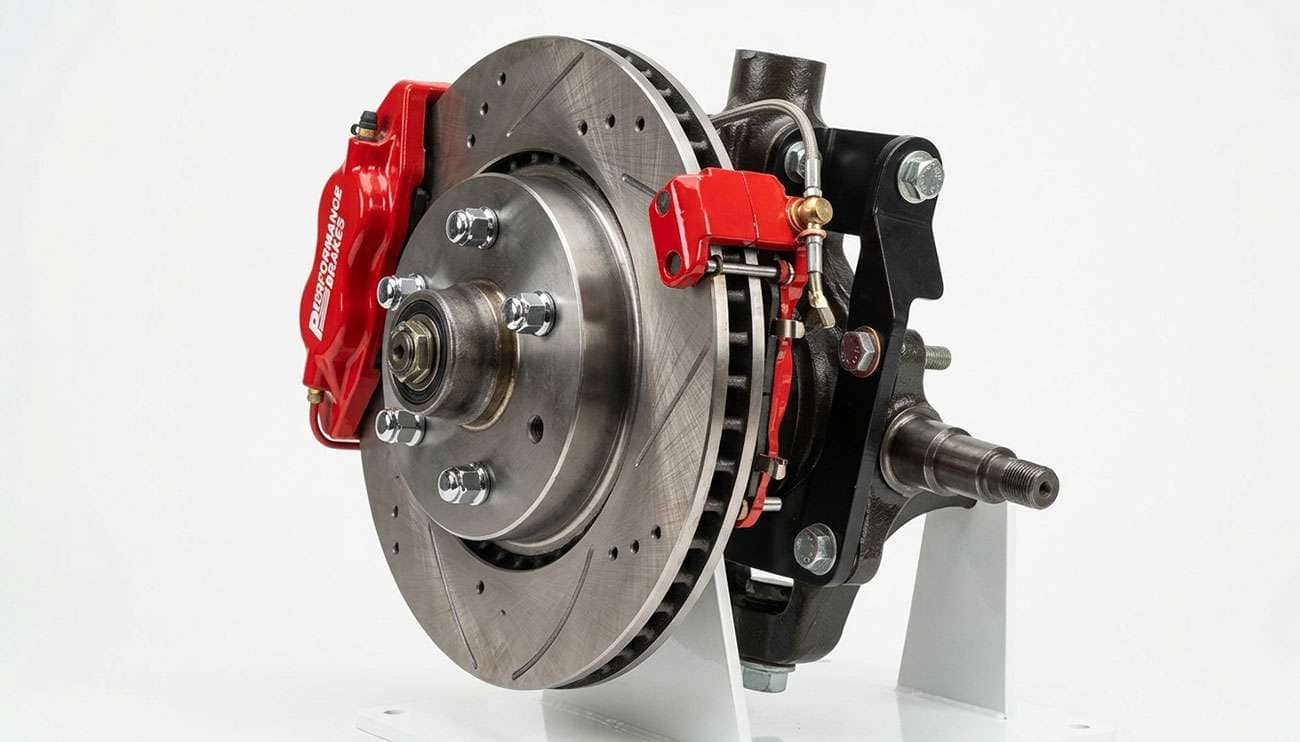
The call I got last Saturday was a familiar one. Guy bolts a Wilwood front disc conversion onto his '67 Camaro, finishes the job around lunchtime, goes to put his original 14-inch Cragar S/S wheels back on, and the wheel won't seat. The caliper hits the inside of the wheel before the lug holes even line up.
I've seen this go wrong more times than I can count. The customer did everything right with the brake kit — bought a quality system, followed the instructions, took his time. Nobody told him his wheels weren't part of the plan. Now he's got a car on jack stands, brand-new brakes that work great, and no way to put the car on the ground.
A drum-to-disc conversion is one of the best upgrades you can make to a classic car. Stopping a 3,500-pound muscle car with four wheel cylinders and a single-piston master cylinder was never a good idea, and modern discs cut the stopping distance dramatically. But the wheel side of the equation is where most guys lose money. This article walks you through why your wheels probably won't fit, the math to figure out what will, and the wheels we actually see clearing the most common conversion kits.
The geometry is different. That's the whole story, but the details matter.
A drum brake lives entirely inside the wheel hub area. The drum itself is just a steel cup, and everything that does the braking — shoes, springs, wheel cylinders — sits inside that cup. From the wheel's perspective, there's nothing to clear except the drum face, which is tucked in close to the spindle. That's the whole reason classic cars came with 14- and 15-inch wheels — they didn't need any more diameter than that to clear the drums.
A disc brake works completely differently. The rotor is a flat disc, much larger in diameter than the inside of a drum, and the caliper is a separate mechanical piece that straddles the rotor edge. That caliper sticks outward, toward the wheel barrel, in a way nothing on a drum brake ever did. So when you swap drums for discs, you've added two clearance problems that didn't exist before — the rotor diameter, and the caliper sticking out into space that used to be empty.
This is why a "bolt-on" disc kit can still fail to bolt your wheel back on. The kit bolts to the spindle just fine. Your wheel doesn't bolt to the kit.
There are two separate measurements that decide whether your wheel will work. Both have to pass. One is easy. The other catches most people.
Check #1: Rotor-to-wheel-diameter clearance. Can the wheel fit over the rotor? The inside diameter of the wheel — measured at the inside of the barrel, not the lip — has to be larger than the rotor. This is the easy one, because rotor diameter is on the spec sheet of every brake kit. If your wheel is 15 inches and the rotor is 11.75 inches, you've got room.
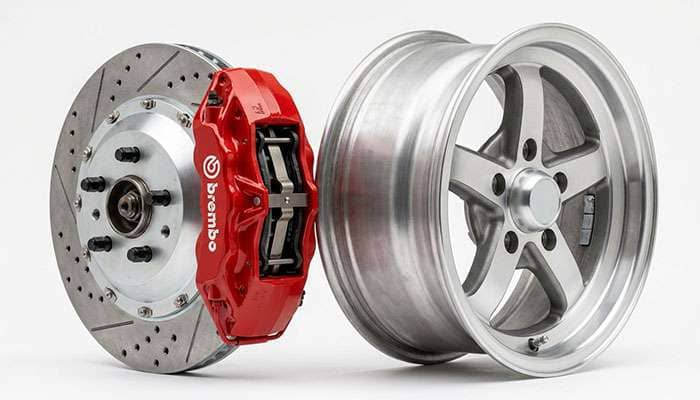
Check #2: Caliper-to-spoke-and-barrel clearance. This is the one that gets people. The caliper sticks out perpendicular to the rotor, and it has to fit in the space between the rotor and the inside face of the wheel. Two things can go wrong here. The caliper can hit the back of the spokes near the center, or it can hit the inside of the barrel near the outer edge. Either contact and your wheel won't seat.
The reason this is hard is because wheels of the same diameter can have completely different inner geometry. A 15-inch wheel with a deep-dish spoke design might clear a caliper that a 15-inch wheel with a flat spoke design won't. The diameter spec doesn't tell you the inside shape.
The trick the brake kit makers use is a fitment template — a flat piece of cardboard or plastic shaped like a cross-section of the brake assembly. You set the template inside your wheel and look for daylight on all sides. If the template touches the wheel anywhere, the brake assembly will too. Most reputable kits include a template or have a downloadable PDF. The 1/8-inch clearance rule is what shop manuals call out — anything less and you risk contact under braking when the caliper expands from heat.
Here's the chart I work from when a customer calls and wants to know what size wheel he's going to need after a conversion. These are real-world numbers based on the kits I've installed and the wheels I've seen clear them, not theoretical minimums.
Brake Kit Type |
Rotor Diameter |
Minimum Wheel Diameter |
Common Applications |
Notes |
|---|---|---|---|---|
Small / OE-style |
10.5"–11" |
14"–15" |
Light cars, daily-drive classics |
Some 14" wheels still clear; check fitment template |
Standard performance |
11"–11.75" |
15" |
Most muscle car bolt-on kits |
Most common kit class; standard 15" wheels work |
Big brake |
12.19"–13" |
17" |
Pro-touring builds, autocross |
14"–15" wheels will not clear; bolt pattern often changes |
Performance / track |
13"–14" |
18"+ |
Restomods, modern conversions |
Larger wheels often required; tire size change too |
One note on this chart: the "minimum wheel diameter" assumes a standard aftermarket wheel with typical inner geometry. A solid steel wheel with a flat face won't necessarily clear at the same diameter as an aluminum wheel with a deeper barrel. Stepping up from 15-inch to 17-inch wheels is the most common move guys make to clear bigger kits — and it usually requires a tire size change too, which is its own decision.
This is the one nobody warns you about until you've already bought the wheels.
Most pre-1971 GM A-body and B-body cars came from the factory with a 5x4.75-inch bolt pattern, which is the same as 5x120.65 in metric. That includes early Chevelles, Novas, Camaros, Impalas, and full-size cars. When you put a modern disc brake conversion on one of these cars — especially the popular kits that use later-model GM hubs — the bolt pattern frequently changes to 5x4.5 inches, or 5x114.3 metric.
That's only a quarter inch difference, but it's enough that your existing wheels will not bolt up. Same wheel, same hub diameter, same lug count — different stud spacing. The 5x4.5 bolt pattern is one of the most common in modern wheels, which is actually good news for buyers — you'll have way more wheel options than the original 5x4.75 ever offered.
Mopar guys deal with their own version. Many Dodge and Plymouth disc conversions change from the original 5x4-inch pattern (often called 5x101.6) to the more common 5x4.5. Ford conversions vary by chassis but often retain 5x4.5 throughout.
The lesson: when you order the brake kit, the very first thing on your checklist is asking what bolt pattern the new hubs use. If it's different from your current wheels, you're buying new wheels — there's no shortcut around that.
Wheel and bolt pattern aren't the only things that change when you convert. A few more line items that catch first-time converters.
The master cylinder. Drum brakes need a small amount of fluid volume to operate — the wheel cylinders move a few thousandths of an inch. Disc brakes move significantly more fluid because the caliper pistons travel farther as the pads wear. Your stock single-pot, drum-spec master cylinder will not supply enough volume for a full disc system. Most conversion kits include a dual-circuit master, but if yours doesn't, budget another $150-$300 for one.
The proportioning valve. Drum-to-disc front conversions shift the braking bias forward — discs apply pressure faster and harder than drums. Without a proportioning valve to bleed off some rear pressure under panic stops, you'll lock the rear wheels before the fronts grab. An adjustable proportioning valve is $50-$100 and a 30-minute install. Skip it and the car gets dangerous in an emergency stop.
The residual valve. Drum brake systems use a 10-psi residual pressure valve to keep slight pressure on the wheel cylinders so they don't retract. Disc brakes don't want that pressure — you'll drag the pads and overheat the rotors. If you're doing front-only disc conversion, the residual valve needs to come out of the front circuit while staying in the rear drum circuit. Most kits handle this; some don't.
Brake lines and hoses. The flexible rubber hose from the frame to the caliper is different from the drum-brake hose. Most kits include them; verify before you start. Hard lines from the master to the proportioning valve may also need rerouting depending on the kit.
Tires. If you're going from 15-inch to 17-inch wheels to clear a big brake kit, your tire size is also changing. The 14- and 15-inch sizes that ran on classic cars don't translate directly to 17s, and you'll want to keep the overall diameter close to stock so your speedometer reads correctly and you don't change the gearing.
Here's what I'd actually put on customer cars after a disc conversion. All of these are in current PPT inventory in the sizes shown.
This covers most muscle car bolt-on kits — the Wilwood D52, the SSBC direct-fit kits, the Master Power Brakes street kits. A 15-inch wheel with a normal inner geometry will clear these.
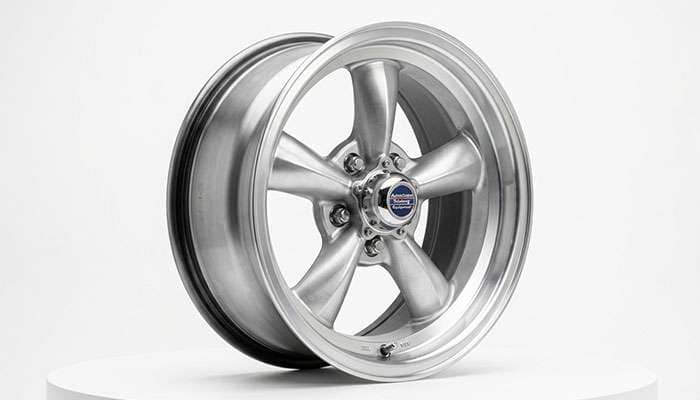
For the classic muscle car look, the American Racing VN105 Torq Thrust D in 15x10 is the go-to. It clears these kits with room to spare, comes in the classic five-spoke design every Camaro and Chevelle owner recognizes, and we sell it in 5x4.5 bolt pattern (5x114.3) which matches most modern conversions. The American Racing VN501 500 in 15x7 is the more period-correct option for milder builds — solid steel-look design, fits clean under stock fenders.
For factory-style replacements with a vintage feel, Wheel Vintiques 54 Series Magnum 500 in 15x10 hits the Mustang/Cougar market dead-on. The 60 Series Pontiac Rallye II handles the Firebird/GTO crowd. The 56 Series Chrysler Rallye covers Mopar B-body and E-body cars. All of these are reproductions of the factory rally wheels but in modern alloy construction, which is sturdier and easier to balance than the original stamped steel pieces.
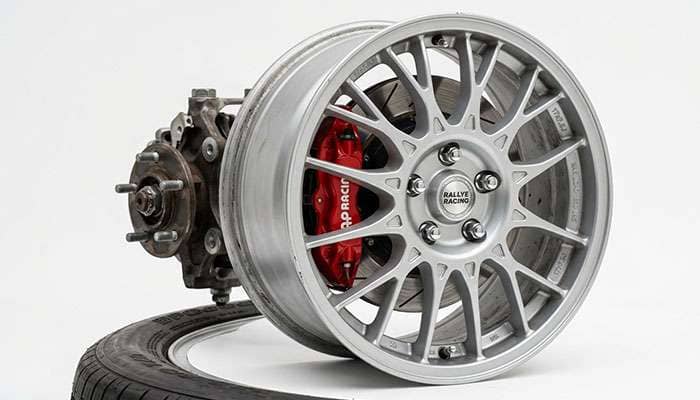
Pro-touring builds and any serious restomod that's running a Wilwood 6-piston up front falls into this category. 15-inch wheels are out at this rotor size — physically impossible. You're moving to 17s minimum.
The Wheel Vintiques 68 Series Chevy Rallye in 17 inches keeps the classic rally look with modern clearance. It's the pick for Chevelles, Camaros, and Impalas that need to look right but clear a 12.19-inch front rotor.
For more aggressive builds, the larger-diameter American Racing Torq Thrust II options in 17 and 18 inches keep the iconic five-spoke style at the diameter you need. Get your backspacing measurement right before you order — at 17-inch wheels with big calipers, backspacing is what makes or breaks the fit.
Forty years of this conversion going sideways, and I see the same handful of mistakes over and over.
Buying the brake kit and the wheels at the same time. Always install the brake kit first, then mock up wheels with the actual hardware in place. Buying both before you confirm clearance means you're guessing twice. I've had customers ship back $1,800 worth of wheels because they didn't test fit first.
Trusting forum advice instead of the fitment template. "Joe on the forum said 15x7 Torq Thrust IIs clear his Wilwood kit on his '69 Camaro" is not the same as your wheel clearing your kit on your car. Different model years, different spindles, different upper control arms. Use the template the brake manufacturer provides.
Skipping the spare tire check. The skinny donut spare in your trunk won't clear a big brake kit. The full-size matching spare you've been carrying since 1979 probably won't either. You either go to a non-clearing spare and accept it's for emergency tow truck rides only, or you upsize the spare to match — which costs another wheel and tire.
Painting or chroming the wheels before the test fit. A chrome plating job on a wheel that doesn't clear is wasted money. Test fit raw or primered wheels before any finish work. This is non-negotiable.
Forgetting the master cylinder. I've seen customers complete the brake kit install, button up the wheels, take the car for a test drive, and discover the brake pedal goes to the floor without slowing the car. The drum-spec master cylinder couldn't supply the disc system. Always swap the master at the same time as the conversion.
A drum-to-disc conversion is the right upgrade for almost every classic that came with drums all around. Modern braking is dramatically safer, more consistent, and less work to maintain. The conversion itself isn't the hard part — the parts are well-engineered, the instructions are good, and weekend mechanics complete them all the time.
The wheel side is where the money gets spent without anyone budgeting for it. New brake kit, new master cylinder, new proportioning valve, and yes — almost always new wheels, both because the existing ones won't clear and because the bolt pattern likely changed underneath. Plan for it from day one and you'll be a lot happier on the back end of the project.
If you're shopping for wheels that clear common conversion kits, our Classic Wheels selection has the muscle-car-era designs in modern construction, and Hot Rod Hank's Wheels covers the hot rod and street rod side. Either way, give us a call before you commit — we'll match the bolt pattern, the diameter, and the backspacing to your specific brake kit before you spend a dime.
Probably not. Most modern disc conversion kits use rotors in the 11 to 11.75-inch range, which require a 15-inch minimum wheel diameter to clear. A few small OE-style kits with 10.5-inch rotors will work with 14s, but they're not common in the aftermarket. If you want to keep your 14-inch look, you'll need to find one of the small-rotor kits specifically.
Often, yes. Many GM disc conversions use later-model hubs that are 5x4.5 (5x114.3) instead of the original 5x4.75 (5x120.65). Mopar conversions sometimes change from 5x4 to 5x4.5. Ford conversions usually stay 5x4.5 throughout. Confirm the new bolt pattern from the kit manufacturer before you order wheels.
A fitment template is a flat cardboard or plastic outline shaped like a cross-section of the brake assembly. Most reputable brake kit makers provide one with the kit or as a downloadable PDF. Set the template inside the wheel and check for at least 1/8 inch of clearance everywhere — between the template edge and the spokes, the barrel, and the wheel face. If the template touches the wheel anywhere, the actual brake assembly will contact under braking heat expansion.
Yes. Disc brakes use significantly more fluid volume than drums, and your original drum-spec master cylinder can't supply enough. Most quality conversion kits include a dual-circuit master designed for the new system. If yours doesn't, budget $150 to $300 for a dual-circuit unit matched to your application. Installing the discs without a proper master will give you a brake pedal that goes to the floor.
Probably not, if it's smaller than your new wheels. A 14-inch donut spare won't clear a kit that required you to upsize the main wheels to 15s or 17s. Either accept that the spare is for getting the car to a tow truck on emergency-only use, or upsize the spare to match. For show cars that rarely see the road, many owners just don't carry a spare.
Front-only handles most of the braking — the front brakes do about 70 percent of the work in a stop. Front-only conversions are cheaper, simpler, and often all the upgrade a classic needs. Rear discs add cost and complexity (parking brake integration is the tricky part) and only matter for serious performance builds or restomods. For a daily-driven classic, front-only is usually the right call.