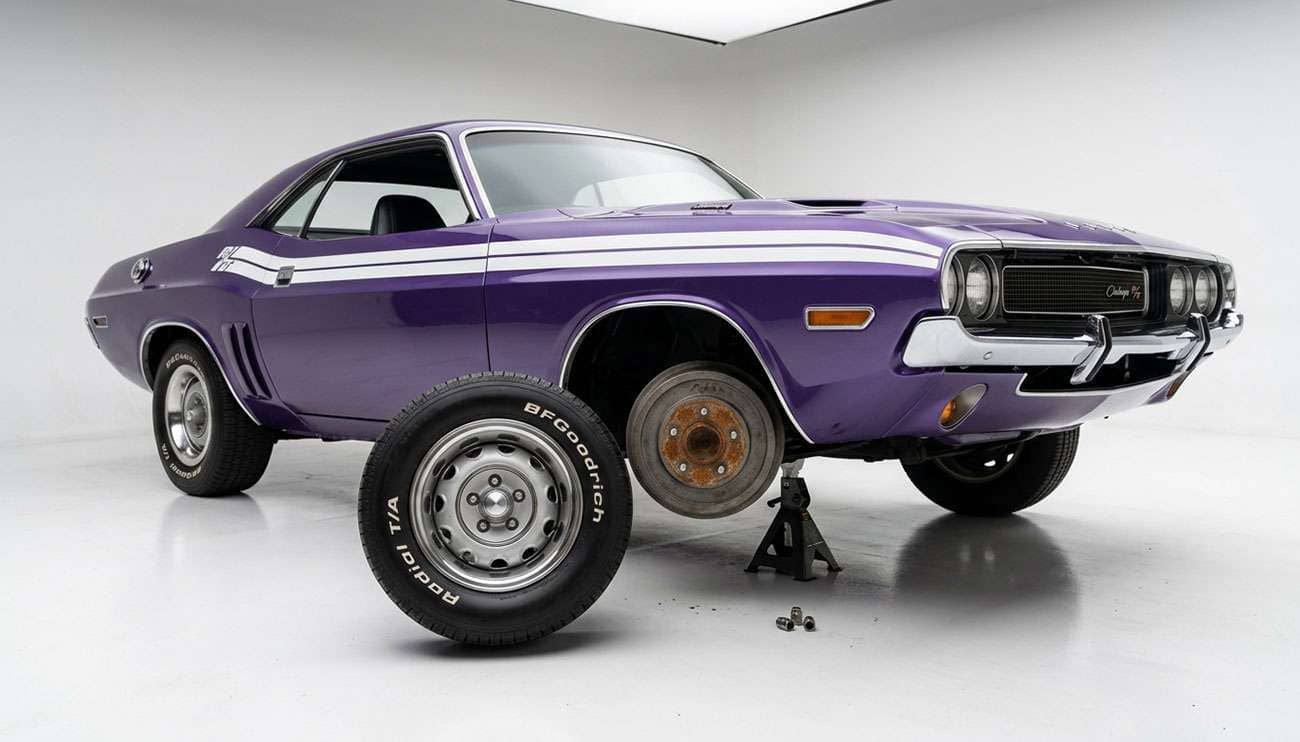
Every spring, when garages around the country start thawing out and folks pull the tarps off their classic cars for the first time in six months, my phone starts ringing. Same conversation, every time. "Hank, I got all five lug nuts off the wheel, and the dang thing won't come off the hub. What do I do?"
I've been getting that call for forty years. It's one of the most common frustrations in this whole hobby, and it's almost never the customer's fault. The wheel didn't grow legs and weld itself to your car overnight. There's a real reason it happens, and there's a real order of operations to get it free without buying yourself a new rim or, worse, sending the car off the jack stands and into the floor.
This article walks you through what I'd actually do if you handed me the keys and pointed at the wheel. The why first, then the methods in the order I'd try them — easiest first, last-resort last. And the part most articles skip: how to make sure you never deal with it again on the next reinstall.
Here's the science, and it matters, because if you understand what's holding the wheel on, you understand why some methods work and others don't.
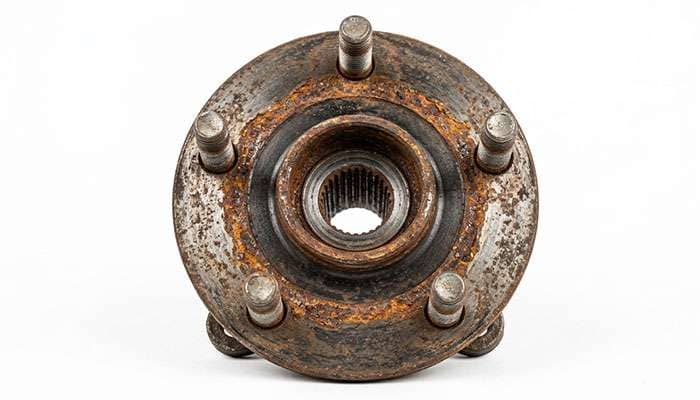
You've got two different metals in contact. The wheel is aluminum or alloy on most modern stuff, steel on older trucks and most classics. The hub flange — that flat round face the wheel mounts against — is steel. Different metals plus moisture equals galvanic corrosion. It's the same reason a stainless steel bolt in an aluminum boat will eventually weld itself in place. The two metals exchange electrons through the moisture, and a layer of oxidation builds up in between. That layer is what's gluing your wheel to the hub.
Three things accelerate it. Road salt is the worst. Cars driven through winter in any state that salts the roads pick up corrosion at four or five times the normal rate. Humidity is second — coastal cars, garage-stored cars that breathe damp air, even just cars driven in rain. And time without movement is third. A car that sits develops corrosion right where the wheel meets the hub, with no rotation or flex to break it up.
That last one is why classic car owners deal with this constantly. A car that's been garage-stored for a decade isn't just sitting on hard tires — it's also sitting on wheels that have effectively cold-welded themselves to the hubs. The longer it sits, the worse it gets.
Before I tell you any of the methods, I need you to do three things. I've seen what happens when people skip these, and it's not pretty.
Level ground, every time. Not a slope. Not a driveway with a slight pitch. Find concrete that's flat enough you'd play a game of marbles on it. A car on jack stands on uneven ground is the start of a bad afternoon.
Jack stands, not the factory jack. The little scissor jack in your trunk is for getting you off the side of the road in an emergency. It is not a piece of shop equipment. The minute you start hitting the wheel with anything heavier than a sneaker, that jack is going to walk. Use proper jack stands rated for the weight, on the manufacturer's recommended lift points.
Leave one lug nut on, threaded loose. This is the one nobody tells you about. When that stuck wheel finally breaks loose, it doesn't always come off slow and easy — sometimes it pops free and tries to roll away across the shop floor. With one lug nut threaded on a couple turns, the wheel can't separate from the hub when it lets go. Pull that last lug only after the wheel is moving freely on the hub.
I'll repeat that one because it's the single most important safety step in this whole article: one lug nut stays on, threaded loose, until the wheel is already loose.
Six methods, easiest to most aggressive. Try them in this order. Most stuck wheels come free at step two or three.
This is the no-tool, no-mess starter. Leave all your lug nuts threaded but only finger-tight — back them off two turns each, with the wheel still on the ground. Lower the car off the jack if it's up. Now drive slowly back and forth, maybe four or five feet each way, in an open space with no traffic. Cut the wheel hard left and right as you go. Do that for about thirty seconds.
What you're doing is using the weight of the car and the sideways loading from steering to break the corrosion bond. Then jack the car back up, finish removing the lugs (except your safety lug), and the wheel should slide off. This works probably half the time, and it costs you nothing.
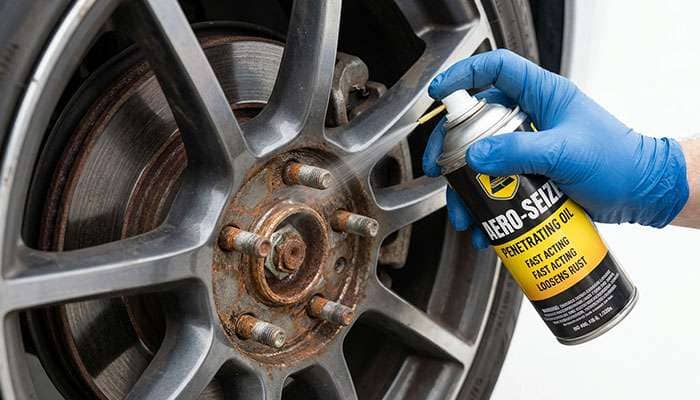
If the roll didn't free it, your next move is chemistry. Spray a generous amount of penetrating oil — PB Blaster, Liquid Wrench, Kroil, whatever your shop runs — into the wheel center, around the hub flange where the wheel meets the steel, and into each lug stud hole. Don't go light. Get it wet.
Now walk away for fifteen minutes. Twenty if you've got the time. Penetrant doesn't work on contact — it works on capillary action, wicking down into the corrosion layer over time. Most people spray it once and immediately go back to hammering, which is why most people think penetrant doesn't work. It works. You just have to wait.
After it's sat, give the wheel a firm push and pull, rotate it on the hub if you can, and try the roll method again. A lot of stuck wheels come loose right here.
Still stuck? Time to add some force. With the car on jack stands and your safety lug threaded loose, plant your foot on the back side of the tire — the inside sidewall — and give it a hard kick. Rotate the wheel a quarter turn and kick again. Rotate, kick. Rotate, kick.
The reason this works better than hitting it with a hammer is the energy distribution. Your foot is a big, soft, distributed impact — it shocks the corrosion layer without concentrating force on any one spot. A hammer, especially on the rim face, will dent or crack the wheel long before it breaks the bond. Use your boot.
This is where you bring out the heavy artillery. Get a piece of 2x4 lumber, about a foot long, and a four- or six-pound sledgehammer. Position the wood across the back side of the tire — never the rim face directly — and hit the wood with the sledge.
The wood spreads the force across a wider area of the tire sidewall and prevents you from damaging anything metal. Move the wood around the back of the wheel as you hit, so you're shocking the bond at different points. Three or four good strikes at each position is plenty.
Important: never put any part of your body under the car during this. If the jack stands give up, the car is coming down on you. Stay alongside, not underneath.
This is my personal go-to, and I've used it more times than I can count. Get a long pry bar or crowbar, at least three feet. Find a strong, solid point behind the wheel — usually the lower control arm, the spindle, or the brake caliper bracket. Position the pry bar so the long end is behind the wheel and the short end has leverage against that solid point.
Wrap a rag around the contact point on the wheel to protect the finish, then pull steady, even pressure. Don't yank — pull and hold. Reposition every thirty seconds to a different point around the wheel. The leverage will do what a kick or hammer can't, because you're applying constant tension that pulls the wheel straight off the hub instead of just shocking it.
This is the method I trust most because it's controlled. You're not swinging anything, nothing's flying, and you can feel the bond letting go before the wheel actually comes free.
If five methods haven't worked, you've got a serious corrosion problem and you're considering the heat trick. A propane torch — not MAPP gas, not oxyacetylene, just propane — heats the steel hub flange in the center area. Steel expands faster than aluminum, so the hub grows slightly relative to the wheel and breaks the corrosion bond.
Two warnings, big ones. Keep the flame off the tire — rubber doesn't recover from heat. And keep it off the brake components — you can damage seals, wreck a bearing, or ruin the caliper. Aim the torch at the center hub face only, not anything around it. Twenty seconds of moderate heat is plenty. Then try the kick or pry again.
If you don't trust yourself with a torch around brake parts, skip this step and go to the shop. There's no shame in it.
I've seen all of these come through the shop, sometimes from professionals who should know better.
Taking all the lug nuts off before the wheel is loose. The wheel can fly off when it breaks free. Even with the car on jack stands, that's a heavy chunk of aluminum and rubber moving fast. I've seen a wheel break a man's foot. Always one lug, threaded loose, until the wheel is moving on the hub.
Hitting the rim face directly with a steel hammer. You will dent it. On an alloy wheel you might crack it, and a cracked alloy is scrap metal — it's not safe to repair structurally, no matter what some shop tells you. Cosmetic damage like curb rash can be repaired, but structural damage to an alloy is a replacement. Use wood, use a rubber mallet on the tire sidewall, or use the pry bar. Never steel-on-rim.
Driving more than a few feet with loose lugs. The roll method works because you're going slow, short distances. Drive a quarter mile on loose lug nuts and you'll snap studs, wallow out the stud holes in the wheel, or actually lose the wheel off the car. A few feet back and forth — that's it.
Greasing the lug nut threads. This is the most dangerous mistake on the list, and I see it constantly. Folks deal with one stuck wheel and decide they'll grease everything next time. Do not put grease or anti-seize on the lug stud threads. Lug torque specs assume dry threads. Lubricated threads dramatically increase the actual clamping force at the same torque reading — you'll over-tighten by 30 percent or more without knowing it. That's how you stretch studs, snap them on the next removal, or crack the wheel from over-clamping. Anti-seize goes on the hub face only, never the threads.
If you're working on something pre-1990, a few things change.
Most classics ran steel wheels from the factory. Steel-on-steel corrosion behaves a little differently than alloy-on-steel — it's more of a rust bond than a galvanic one, and it tends to be even more stubborn because the two metals are similar. The methods are the same, but plan on more penetrant and more time. I've had steel rims that needed an overnight soak in PB Blaster before they'd come loose.
If you've got a car that's been sitting more than a couple years, do all four wheels at once even if only one is giving you trouble. The others are corroded too — you just haven't tried yet. Knock them all loose, clean the hubs, and reinstall properly. You'll save yourself the same fight four times.
And when you're prying, mind the whitewall. A pry bar that slips can gouge a sidewall, and a vintage whitewall tire is not cheap to replace. Pad the contact point with a thick rag or a piece of cardboard.
This is the part most folks skip, and it's why the same wheel gets stuck on the same car every spring. Take ten minutes here and you won't deal with this again.
First, clean the hub face. Get a wire brush — a small one, the kind you'd use for cleaning a barbecue grill — and scrub the entire mating surface of the hub flange. Get rid of every flake of rust and corrosion. Get into the lug stud holes too. The hub should look clean, gray steel, not rust-orange.
Next, clean the back side of the wheel where it touches the hub. Same wire brush, same effort. If you can see corrosion ring marks on the back of the wheel, scrub them off. They're the reverse imprint of what was on the hub.
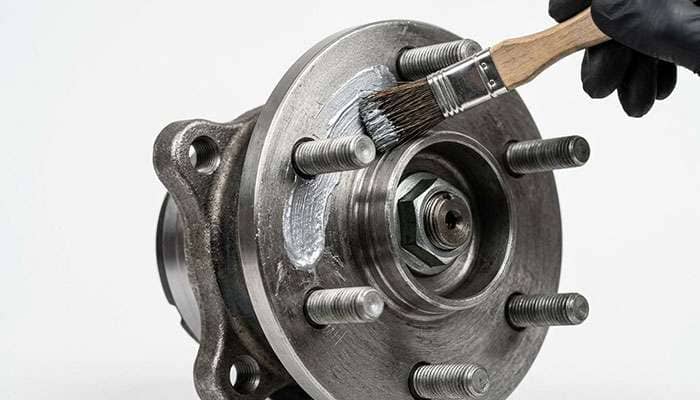
Now apply a thin coat of anti-seize on the hub face only. The lug stud threads stay dry. I'll say it again because it's that important — the threads stay dry. Anti-seize on the hub face is what keeps the wheel from bonding back on. Anti-seize on the threads will get you hurt.
Mount the wheel, thread the lug nuts on by hand to make sure nothing's cross-threaded, then snug them in a star pattern — opposite lug to opposite lug, never around the circle in order. For aluminum wheels especially, the star pattern matters — it seats the wheel flat against the hub. Torque to the spec for your vehicle, usually somewhere between 80 and 110 foot-pounds.
Then this last step that almost nobody does: re-torque after 50 to 100 miles of driving. The wheel seats further after a heat cycle, and the lugs need a final check. This is shop-procedure on every new install, but most home DIYers skip it.
There's no shame in admitting a job needs a shop. Four situations where I'd tell you to stop and call us instead of pushing harder.
The valuable wheel. If you're working on a numbers-matching set of vintage aluminum or a rare set of mags, the risk-reward changes. A scratch on a $500 wheel is annoying. A crack on a $5,000 set of Halibrands is a disaster. Let a pro who's done this a thousand times handle it.
The cracked alloy. If you see any cracks in the wheel before you start — even hairline cracks around the lug holes or the spokes — stop. Don't apply any force. That wheel is already compromised and the methods in this article will finish it off. Replace the wheel before driving the car.
The seized lug stud. If a stud is snapped or so corroded that the lug nut is welded to it, that's a different repair entirely — you're looking at pressing out studs, which usually means pulling the hub. Not a driveway job on most cars.
The "I'm out of ideas" moment. Sometimes the corrosion is just too far gone. A shop with an impact gun, an air hammer, and a hydraulic press can deal with what your driveway tools can't. We've done it for plenty of customers who tried everything in this article first. No judgment.
A stuck wheel isn't a sign your car is broken. It's a sign nobody cleaned the hub face the last time the wheel came off. Knowing why it happens — the dissimilar metals, the moisture, the time without movement — tells you how to get it loose without wrecking anything, and how to make sure it doesn't happen again.
The order I'd try is the same order I've been trying for forty years. Roll it loose, soak it with penetrant, kick it, then escalate from there. Most wheels come free in the first three steps. The ones that don't usually need a shop, and there's no shame in that.
Most important takeaway: clean the hub face on every wheel install, anti-seize on the hub face only, never the threads, and re-torque after a few miles of driving. Do that once and you'll never read an article like this again.
If you damaged a wheel in the fight and need a replacement, our Classic Wheels and Hot Rod Hank's Wheels selections cover most vintage applications. Give us a call before you order — we'll make sure the bolt pattern and offset match what your car needs.
Almost always corrosion between the wheel and the steel hub face. Aluminum or alloy wheels mated to a steel hub develop galvanic corrosion in the contact area, which essentially welds the wheel in place over time. Road salt, humidity, and long periods of sitting all accelerate it. The lug nuts are off, but the corrosion ring is holding the wheel.
Only for a few feet, back and forth, on a level surface in a closed area with no traffic. Back the lug nuts off about two turns so they're still on the studs, then drive slowly four or five feet forward and back with the steering cut hard. Anything more than that and you risk damaging the wheel or losing it entirely.
Never hit the rim face directly with a steel hammer. You'll dent or crack the wheel. If you need to use a sledgehammer, place a piece of 2x4 lumber across the back of the tire sidewall and hit the wood. The wood spreads the force across a wider area and protects everything metal.
No — never on the threads. Lug torque specifications assume dry threads. Lubricating the threads dramatically increases the actual clamping force at the same torque reading, which over-tightens the assembly, can stretch or break studs, and can crack the wheel. Anti-seize goes on the hub face only, where the wheel meets the steel flange, never on the studs.
PB Blaster, Liquid Wrench, and Kroil all work well. The brand matters less than the application. Spray generously into the hub area and around the lug stud holes, then let it sit for at least fifteen minutes before trying to free the wheel. Most people don't wait long enough — the chemistry works through capillary action, not on contact.
Clean the hub face with a wire brush every time you remove a wheel, scrub the back of the wheel where it mates to the hub, apply a thin coat of anti-seize on the hub face only, mount the wheel, torque the lug nuts in a star pattern to the vehicle spec, and re-torque after 50–100 miles of driving. Do that once and the wheel won't bond to the hub again.