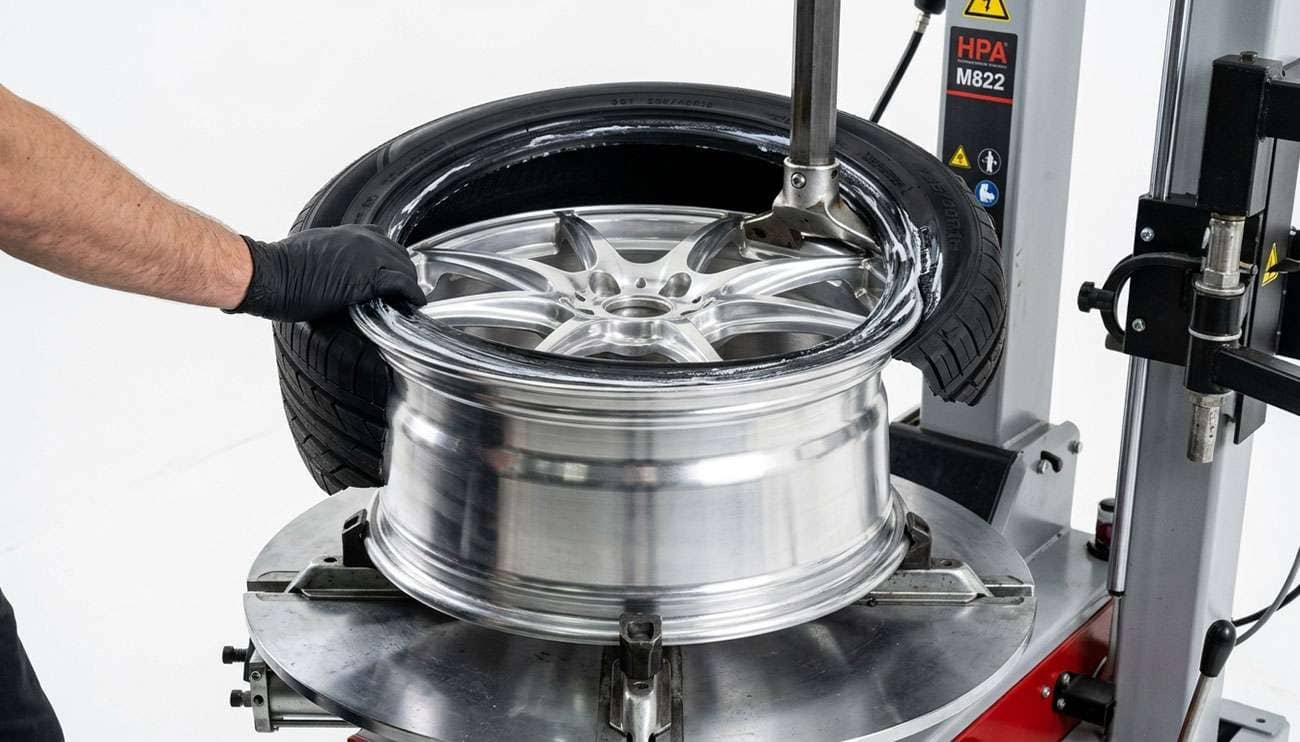
The short answer: Installing a tire is four jobs: break down and clean the wheel, work both beads over the flange, seat the beads with air, and balance the assembly. The variable most guides never name is the wheel. Where its drop center sits decides which side you mount from. Whether a TPMS sensor is bolted through the valve hole decides where the valve sits while you work. Whether it is one-piece, multi-piece, or wire-spoke decides whether you need a tube, a seal check, or a safety cage. And the seating limit is 40 psi, no matter what number is molded on the sidewall.
I handle fitment at Performance Plus Tire, so most of my day goes to the details that separate a clean install from a car that comes back with a vibration, a slow leak, or a warning light. Most how-to guides give you one procedure, as if every wheel were built the same way. They aren't. Find your setup below before you touch a tire iron.
Your Setup |
How to Spot It |
What Changes in the Install |
|---|---|---|
Standard one-piece wheel |
The deep well in the barrel sits closer to the wheel face |
Mount face-up, from the front. The procedure most guides describe. |
Reverse-mount, deep-dish, or wide-lip wheel |
The well sits closer to the back flange |
Mount from the back, face-down. Mounting from the front can fracture the bead wire. |
Car or light truck built from late 2007 on |
Metal valve stem with a nut, or a sensor behind the stem |
TPMS sensor in the valve hole. Keep tools off it and replace the service kit. |
Two- or three-piece modular wheel |
A ring of small bolts around the barrel or center |
Leave the assembly bolts alone, keep tools off the seam, leak-test after inflation. |
Wire wheel or tube-type tire |
Laced spokes, or "Tube Type" on the sidewall |
Tube and rim strip required. A radial tire needs a radial-rated tube. |
Low-profile or run-flat tire |
Aspect ratio of 40 or lower, or a run-flat marking |
Stiff, short sidewalls need a machine with an assist arm. |
Split-ring or lock-ring truck rim |
A removable ring around the outer edge |
Deflate fully, inflate only in a safety cage. Not a driveway job. |
Not quite. "Installing tires" covers two jobs. Mounting is putting the tire onto the wheel and seating its beads. Installing, in the narrow sense, is bolting the finished assembly onto the vehicle. If you are swapping on a spare or bolting on a wheel and tire package that arrived mounted, you are only doing the second job.
That job is about clamping force. A torqued lug nut stretches the stud like a spring, and that stretch clamps the wheel to the hub. Too little and the wheel shifts under braking. Too much and the stud yields. So:
Your torque spec comes from your vehicle maker. For test-fitting and clearance checks on aftermarket wheels, see our guide to installing new rims on your own car. The rest of this article covers the harder job: getting the tire onto the wheel.
From the side closest to the drop center. On most wheels that is the front, so you mount face-up. On reverse-mount wheels it is the back. This is the most important fact in tire mounting, and the one I see left out most often.
Here's the mechanism. A tire bead is built around a bundle of steel wire that does not stretch. Yet it has to pass over a flange larger than itself. The only way that works is slack. Look inside any wheel barrel and you will see a valley, the drop center, roughly 0.7 inch deeper than the bead seats beside it. Push one side of the bead into that valley and the opposite side gains enough slack to climb over the flange. Every tire iron trick and every tire machine motion exists to keep the bead in that valley while the other side goes over.
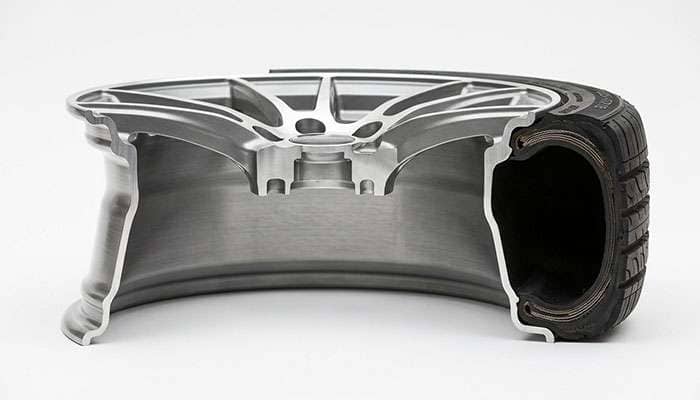
The drop center is not centered, and its location sets your mounting side:
To check yours, measure from each flange to where the valley starts. The shorter side is your mounting side.
Mount from the long side and the bead has to travel across the full barrel before it can drop into the well. A powered tire machine will force it anyway, with hundreds of foot-pounds of turntable torque. That can tear the bead rubber, damage casing cords, or fracture the bead wire. None of it shows from the outside. A tire with a kinked bead wire can look perfect, hold air, and fail during inflation or months later on the highway.
Carefully, and from the right angle. Under FMVSS 138, NHTSA phased in tire pressure monitoring starting in October 2005, and every new passenger car, SUV, light truck, and van rated 10,000 lb GVWR or less built on or after September 1, 2007 has it. Most use direct systems: a battery-powered sensor bolted to the back of the valve stem, inside the tire.
On an older car, you pull the old rubber valve stem and pop in a new one. On a 2008 or newer car, that stem is probably the sensor, and pulling it like a rubber stem breaks it. Trained technicians handle a sensor wheel like this:
No sensor? Replace the rubber snap-in valve stem with every new tire. Snap-in stems are typically rated to about 65 psi, so light truck tires running above that need a metal clamp-in stem. Moving sensors to new wheels raises its own questions, covered in our article on TPMS sensors for aftermarket wheels.
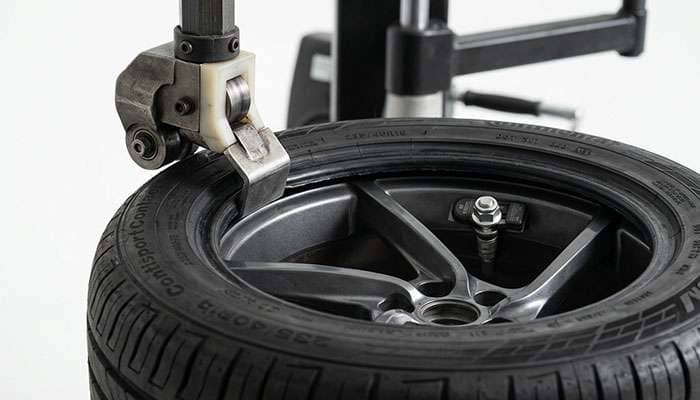
On the right tire and wheel, yes. Plenty of people mount trailer tires, older 15-inch tires, and off-road tires on steel wheels by hand. You need a bead breaker, two or three tire irons, plastic rim protectors, non-petroleum mounting lube, a valve core tool, and a compressor with a clip-on chuck. You also need a way to balance the result, which is where most DIY setups fall short.
What decides whether you should is sidewall height and stiffness. A tall, soft sidewall gives you rubber to flex while you hold the bead in the drop center. A short, stiff one gives you almost none, so the irons lever harder and the force goes into the wheel flange and the bead. That is how alloy wheels get gouged and beads get damaged.
The market has moved hard in that direction. Roughly one in four passenger tire sizes sold today is 40-series or lower, and the U.S. Tire Manufacturers Association publishes a separate mounting procedure just for low aspect ratio tires. Run-flats go further: some tire makers restrict mounting and demounting them to workshops they have certified. Here's how the realistic options compare:
Method |
Handles Well |
Struggles With |
Balancing |
|---|---|---|---|
Tire irons and a manual bead breaker |
Steel wheels, trailer tires, tall sidewalls |
Alloy finishes, low-profile tires, TPMS and reverse-mount wheels |
Separate; a bubble balancer is static only |
Manual bench tire changer |
Most 14- to 17-inch passenger and light truck tires |
Stiff sidewalls, wide wheels, run-flats, polished lips |
Separate |
Shop machine with assist arm |
Low-profile, large-diameter, and most run-flat tires |
Very little, if mounted from the correct side |
Dynamic or road force, same visit |
Pre-mounted wheel and tire package |
Any combination; arrives mounted and balanced |
Only applies when buying wheels and tires together |
Done before it ships |
The honest dividing line: if you're in the top two rows of the first table and can dynamic-balance the result, DIY is reasonable. Anything lower belongs on a machine.
Decide before the first bead goes on. A tire mounted backward can't be flipped; it has to come off and go on again, which is a second chance to damage the bead.
On whitewalls, keep the machine head off the white rubber, and wipe mounting lube off the white band before it dries. For more on tread and wheel orientation, see our breakdown of directional tires and wheels.
These three are where a standard install goes wrong fastest, and they are common on the classic and custom cars we see every week.
A wire wheel always gets a tube, even with a tubeless tire, because air escapes around the spoke nipples. Cover the nipples with a rim strip so their ends can't chafe through the tube. Match the tube to the tire's size and construction; a radial tire needs a radial-rated tube. A light dusting of talc keeps the tube from sticking inside the casing. Inflate a few psi first so the tube takes its shape and isn't pinched under the bead, then seat the beads. New tire, new tube, every time. Our comparison of tube-type vs. tubeless classic tires covers when a classic needs a tube even without wire wheels.
Roughly one in five aftermarket wheel designs on the market is a two- or three-piece build. They mount like a one-piece wheel with two exceptions. Leave the small assembly bolts alone; the factory torques them, and disturbing them can break the seal between sections. And keep every tool off the sealant at the seam. After inflation, brush soapy water around the seam and valve and watch for bubbles.
Vintage trucks, military-surplus vehicles, and heavy equipment can still run multi-piece rims with a removable ring. A mismatched, bent, or unseated ring can leave the rim at lethal speed during inflation. For shops that service large vehicles, OSHA standard 1910.177 requires a restraining device for inflating tires on multi-piece wheels, and that is the only sensible rule in a home garage too. Deflate completely, core out, before you loosen anything, then take it to a shop with a cage.
No more than 40 psi. The U.S. Tire Manufacturers Association's mounting bulletin for passenger and light truck tires says never inflate beyond 40 psi to seat beads. Once both beads are seated, you can raise pressure to operating pressure, but never beyond the maximum molded on the sidewall.
Those are two numbers doing two jobs. The sidewall maximum is the most pressure the tire can hold in service once the bead is locked to the rim. The 40 psi limit applies while the bead is still sliding into place.
The physics explains why. At 40 psi, the air inside a typical 225/65R17 SUV tire pushes outward on each sidewall with roughly 14,000 lb of force, about seven tons. Every 10 psi more adds close to two tons. Once seated, the rim flange carries that load. While the bead is still hung up, a weak spot, a damaged wire, or a mismatched size can let go all at once.
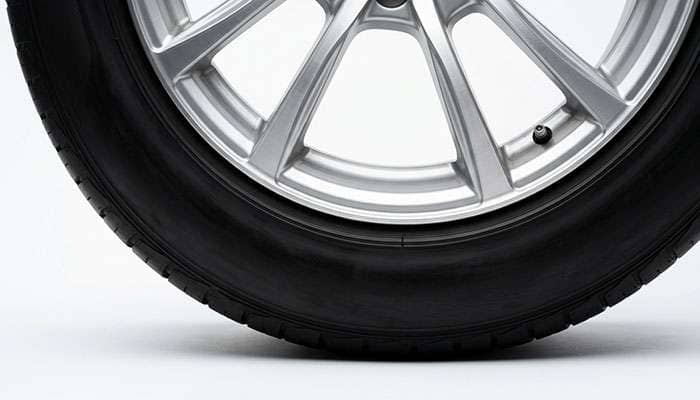
The bead has to climb over the rim's safety hump before it locks onto the bead seat, which is the familiar pop. Our explainer on the tire bead seat safety hump shows how it works.
Yes, every time. No tire and no wheel is perfectly uniform, and the combination is what gets balanced. Two steps decide the result: how you line the tire up on the wheel, and how you hold the wheel on the balancer.
Match mounting comes first. A yellow dot on the sidewall marks the tire's lightest point; line it up with the valve stem. A red dot marks the tire's high point of radial force variation; line it up with the wheel's low point, marked by a dot, dimple, or sticker when the wheel maker marks it. If both dots are present and you know the wheel's low point, red takes priority. Matching high to low can cancel runout no amount of weight will fix.
Then use the right balancer. A bubble balancer is static and single-plane, fine for a trailer and not enough for a modern car at highway speed. A dynamic spin balancer corrects both hop and wobble with weights on two planes; that is the standard. A road force balancer adds a load roller to measure the tire under weight, the right tool for a stubborn vibration. See our explanation of road force balancing.
Centering matters as much as the machine. A hub-centric wheel centers on a cone through its bore, the way it centers on your hub. A lug-centric aftermarket wheel with an oversized bore has to be centered on its lug holes with a flange adapter, because that is how it centers on the car. Balance it on a cone through a sloppy bore and the machine reads zero while the wheel spins off-center. Use adhesive weights behind the spokes on polished, painted, or custom lips.
A bad install rarely shows in the driveway. It shows over the next few hundred miles, and the costs climb in order:
Every rung costs more than doing it right the first time. If you're buying new wheels anyway, the cheapest way off the ladder is to have the tires mounted and balanced before the wheels reach you.
If your setup landed below the first two rows of that table, or you'd rather skip the machine work entirely, our wheel and tire packages ship mounted, balanced, and ready to bolt on. Call the shop before you order and we'll confirm whether your vehicle needs TPMS sensors, lug hardware, or hub-centric rings with the package.
The steps for installing a tire haven't changed in decades: break it down, mount it, seat it, balance it. The hardware has. Since late 2007, most new cars carry a sensor in the valve hole. Wheels have grown deeper, wider, and more often multi-piece. Sidewalls have gotten shorter and stiffer.
So start with the wheel, not the tire. Mount from the drop center side, keep tools off the sensor, and know whether the wheel is one-piece, modular, or wire-spoke. Then hold seating to 40 psi, balance on the right centering method, and torque the wheel on in a star pattern.
Yes, on tall-sidewall tires and standard one-piece or steel wheels, using a bead breaker, tire irons, rim protectors, and mounting lube. Low-profile tires, run-flats, reverse-mount wheels, TPMS wheels, and split-ring rims are better done on a shop machine. You also need a dynamic balancer to finish the job.
No more than 40 psi on passenger and light truck tires, according to the U.S. Tire Manufacturers Association. If the beads haven't seated by 40 psi, deflate completely, reposition the tire, re-lube, and retry. The sidewall maximum applies only after the beads are seated.
From the side closest to the drop center, the deep valley in the wheel barrel. On most wheels that is the front. Reverse-mount wheels, including most deep-dish and wide-lip designs, must be mounted and dismounted from the back.
Yes. Without TPMS, replace the rubber snap-in stem with every new tire. With TPMS, the sensor can usually be reused, but it should get a new seal, washer, nut, and valve core, with the nut torqued to spec in inch-pounds.
Yes, every time a tire is mounted. Line up any match-mounting dots first, then balance on a dynamic spin balancer using the correct centering method for the wheel. A road force balancer is the best tool for a vibration a standard balance doesn't fix.
Yes. Re-torque the lug nuts with a torque wrench after the first 50 to 100 miles, especially on new alloy wheels, tightening in a star pattern to your vehicle maker's spec.