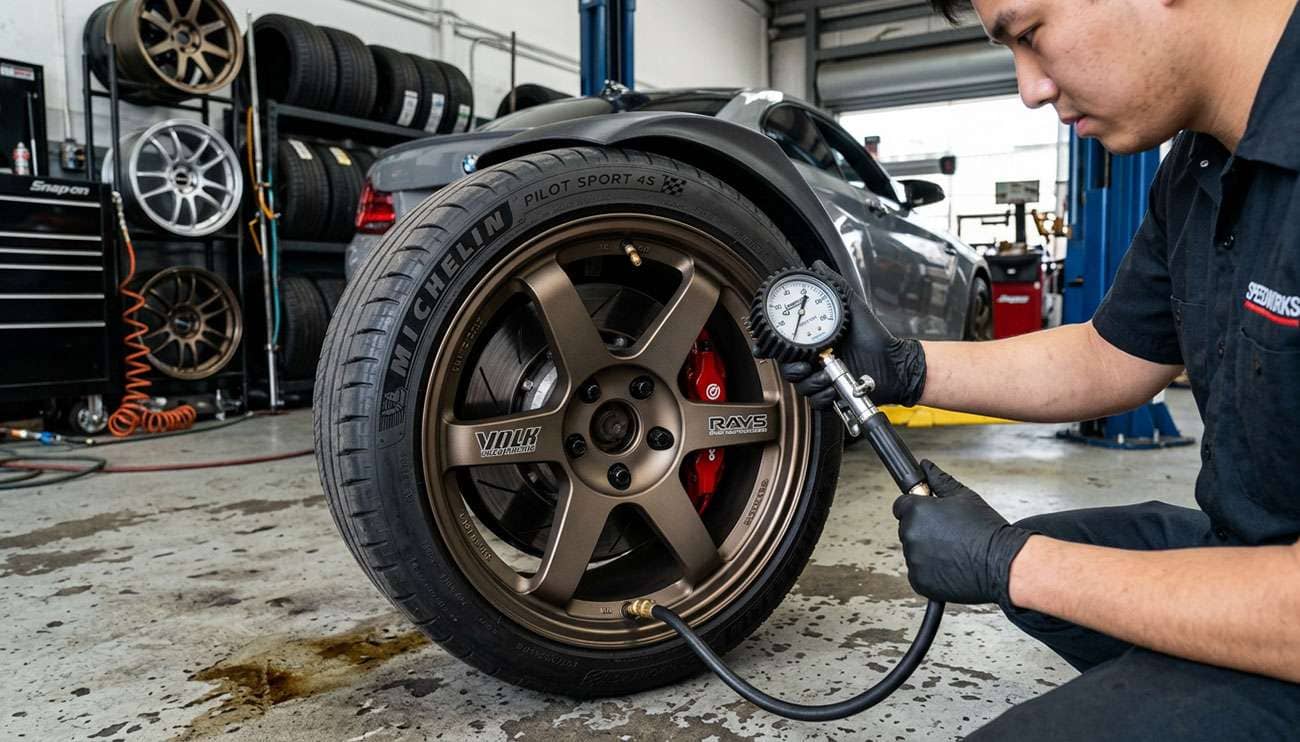
Tire pressure stands as the single most critical factor in tire performance and safety. When tires run under-inflated, they build up dangerous heat that causes irregular wear patterns and internal structural damage. Over-inflated tires create the opposite problem, making them prone to cuts and punctures from road hazards like potholes.
At Performance Plus Tire, we understand that aftermarket wheels and tires represent a significant investment in your vehicle's performance and appearance. That's why we've developed this essential maintenance guide to help you protect that investment. Our expert recommendations cover everything from monthly pressure monitoring to proper tire rotation every 5,000-8,000 miles, plus proven wheel care techniques that maintain both function and finish.
These time-tested maintenance practices will keep your aftermarket setup performing at peak levels while extending service life far beyond factory expectations.
Aftermarket wheel installation requires precise technical verification before mounting tires. Incorrect specifications create expensive fitment problems and serious safety risks.
Bolt pattern determines whether wheels will physically mount to your vehicle. A marking like 5x114.3 indicates five lug holes positioned in a 114.3mm diameter circle. Over 18 different patterns exist across vehicle types, from 3-lug configurations to 8-lug heavy-duty applications.
Hub bore measurement represents the center hole diameter that fits over your vehicle's hub. Hub-centric wheels match your exact hub diameter, delivering optimal safety and the smoothest possible ride. Lug-centric wheels use oversized center bores and rely on lug nuts for centering, which can create alignment inconsistencies.
Offset measures the distance in millimeters from the wheel's mounting surface to its centerline. Three offset types define wheel positioning: positive offset moves the mounting surface toward the street side (common on front-wheel-drive vehicles), zero offset aligns the mounting surface with the centerline, and negative offset positions the mounting surface toward the brake side for an aggressive stance. Factory wheels typically feature high positive offsets around +45mm, while aftermarket designs often use lower offsets for improved appearance.
Visual inspection before tire mounting catches structural flaws and finish defects that worsen under driving loads. Check for cracks, porosity, or coating irregularities that compromise wheel integrity.
Test fitting prevents costly installation errors. Place each bare wheel on your vehicle's hub to confirm bolt patterns align perfectly with all studs. Maintain minimum 3-4mm clearance between wheels and brake components. While performance brakes can technically operate with 1-2mm clearance, experienced installers recommend at least 3mm clearance in all directions from brake calipers.
Have an assistant turn the steering wheel to full lock in both directions while you watch for contact with fenders, suspension parts, or wheel wells. Front strut interference at full steering lock creates the most common fitment problem.
Load index numbers indicate the maximum weight each tire can support. Passenger vehicle load indexes typically range from 75 to 100. A load index of 94 corresponds to 1,477 pounds per tire at maximum air pressure.
Speed rating designates the maximum safe operating speed for each tire. Ratings span from Q (99 mph) to Y (186 mph). Always replace tires with equivalent or higher speed ratings. When mixing different speed ratings, install matching pairs on the same axle, as your vehicle's speed capability becomes limited by the lowest-rated tire.
Aftermarket tires require regular attention to deliver maximum performance and longevity. Consistent maintenance prevents costly premature wear and dangerous safety issues.
Most vehicles need tire pressure between 28 and 36 PSI. Check your specific recommendation on the driver's door jamb sticker, not the tire sidewall, which shows maximum pressure rather than optimal inflation. Always check pressure when tires are cold - after the vehicle has been parked for three hours or driven less than a mile. Temperature changes affect readings dramatically. For every 10°F drop, tire pressure decreases about 1-2 PSI. When checking hot tires, add 4 PSI above the recommended cold pressure, then recheck when cool.
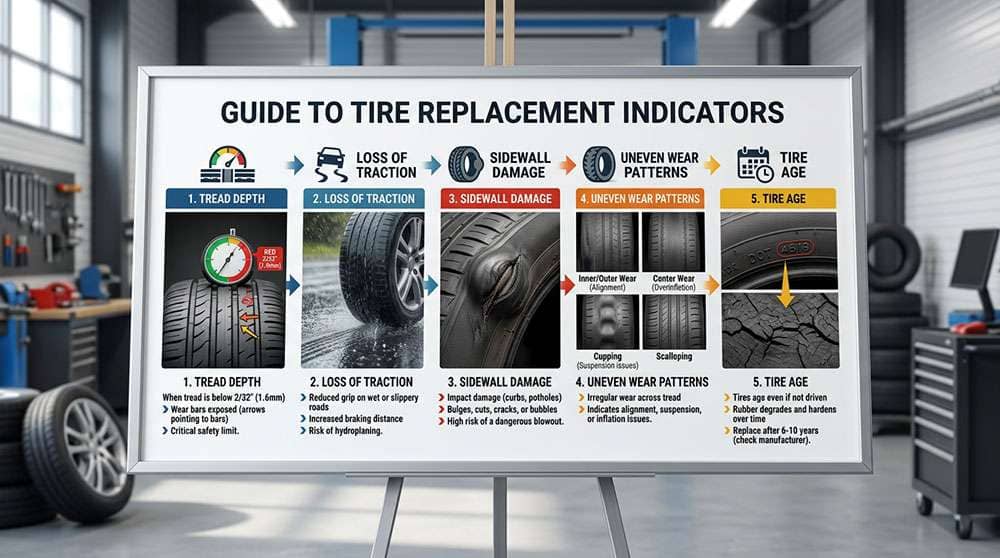
New tires start with 10/32 or 11/32 of an inch tread depth. Replace tires when tread reaches 2/32 of an inch. Use the penny test by inserting a penny with Lincoln's head facing down into the tread groove. If you see all of Lincoln's head, your tread has reached 2/32" and needs immediate replacement. The quarter test uses Washington's head to measure 4/32" depth, the point when wet-weather performance begins declining.
Rotate tires every 5,000 miles to ensure even wear. Front tires wear faster on front-wheel-drive vehicles because they handle both steering and power delivery.
Monthly inspections catch problems early. Look for uneven tread wear, cracks or bulges in sidewalls, and embedded objects like nails. Edge wear indicates underinflation, while center wear signals overinflation.
Regular cleaning removes grime and old tire dressings that break down rubber compounds. This prevents buildup that accelerates deterioration and reduces tire life.
Balance tires every 6,000 miles to maintain smooth performance. Vibrations in the steering wheel at speeds above 45 mph indicate front tire imbalance, while seat or floorboard vibrations point to rear tire issues.
Different wheel finishes require specific cleaning methods to prevent damage. Wash aftermarket wheels every 1-2 weeks using mild soap and water with a dedicated wash mitt. pH-balanced cleaners (pH 6-8) work safely on all wheel finishes.
Acidic cleaners dissolve brake dust effectively but will damage bare aluminum, polished, and anodized finishes. Chrome wheels need pH-neutral soap applied when completely cool to prevent water spots. Alloy wheels vary by construction type: cast alloy wheels require non-acidic cleaners and regular sealing, while forged wheels handle less aggressive cleaning products.
Monthly inspections catch problems before they become expensive repairs. Look for discoloration, paint bubbling, or small spots that signal corrosion beginning. Check outer rims for bends or dents that cause vibrations or steering pull. Examine spokes carefully, as stress cracks typically start there.
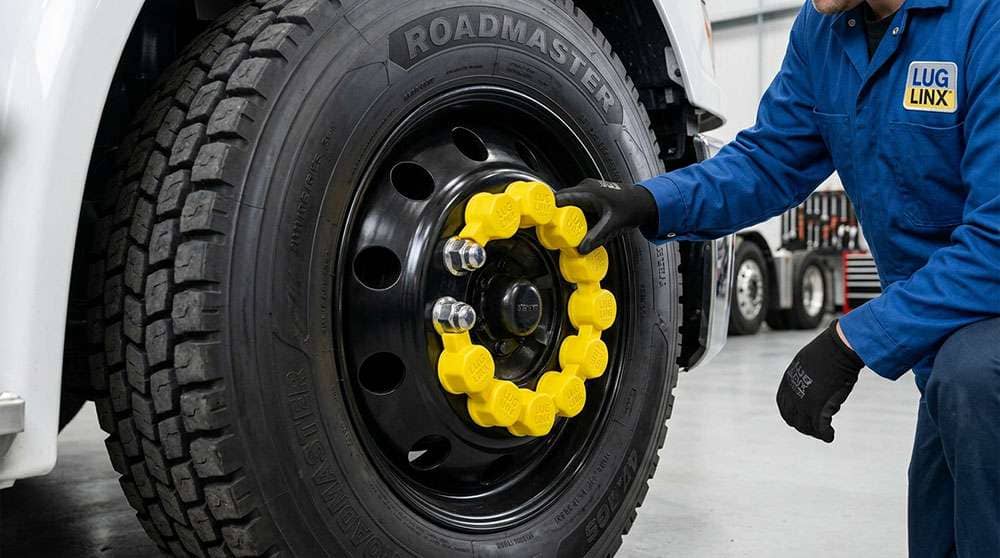
Most passenger vehicles require 80-120 ft-lb torque. Tighten lug nuts using a star pattern to distribute pressure evenly across the wheel. Re-torque after 50-100 miles of driving, as heat and vibration can cause nuts to shift.
Apply protective wax or sealants immediately after cleaning. Ceramic coatings block UV rays and corrosion while repelling brake dust buildup. Wheel sealants need reapplication every three months for maximum protection.
Check alignment every six months or 6,000-10,000 miles to prevent uneven wear. Warning signs include uneven tire wear patterns, vehicle pulling to one side, crooked steering wheel when driving straight, and squealing tires during turns.
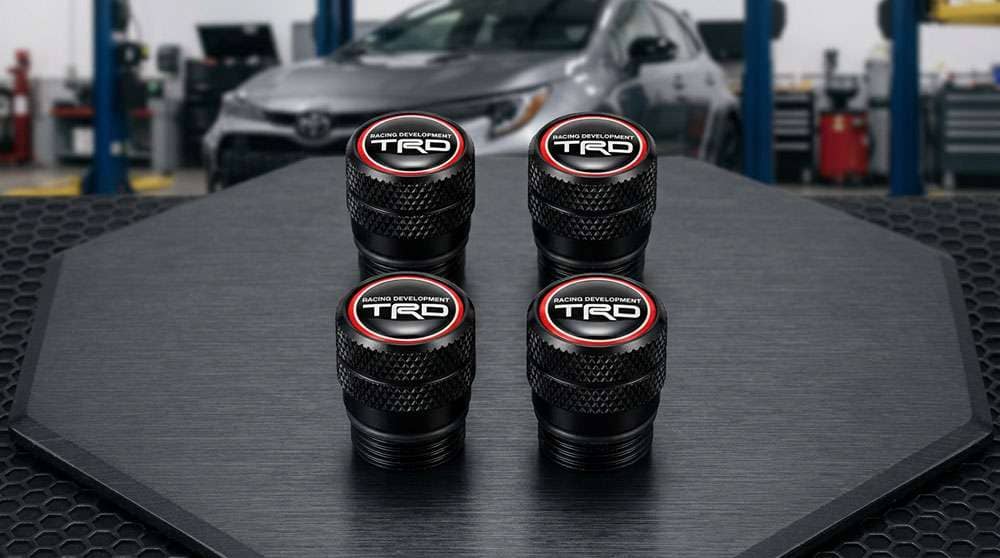
Valve stems often get overlooked, but these small components can cause big problems when they fail. Damaged valve stems create slow leaks that gradually rob your tires of pressure, or worse, sudden pressure loss that compromises your safety on the road.
Valve stems serve as the gateway to your tire's air pressure. The rubber material breaks down over time, developing cracks, dry rot, or other damage that allows air to escape. Smart tire maintenance means replacing valve stems whenever you install new tires, since the rubber degrades at roughly the same rate as your tires. Heavy-mileage drivers should consider replacement every 3-5 years to stay ahead of problems.
During your regular tire inspections, examine valve stems closely for any signs of cracking, tearing, or weathering. Here's a simple test: spray soapy water on the stem and cap area - bubbles indicate air leakage that needs immediate attention. Remember that TPMS sensors connect directly to valve stems, so a damaged stem can disable your pressure monitoring system entirely.
Proper storage extends tire life significantly when you're not using seasonal wheels or spare sets. Keep tires in a cool, dry, climate-controlled space away from temperature extremes. Before storage, wash tires thoroughly with warm soapy water to remove all brake dust and road grime, then allow complete drying.
Seal each tire in an airtight plastic bag to prevent oil evaporation from the rubber compound. Avoid areas near equipment that generates ozone - battery chargers, electric motors, furnaces, and sump pumps all emit ozone that accelerates rubber deterioration. Mount tires on hooks through the rim center or stack them with sidewalls facing down. Store unmounted tires standing upright to prevent flat spots.
The quarter test provides a reliable gauge for replacement timing - when Washington's head becomes visible, you've reached 4/32" tread depth where wet-weather grip starts declining. Age matters as much as wear: replace tires every 6 years regardless of remaining tread. Monthly inspections should catch sidewall damage, bulging, or irregular wear patterns that signal immediate replacement needs.
Vibrations tell a story about your tire and wheel condition. Steering wheel shake points to front tire problems, while vibrations felt through the seat indicate rear tire issues. Speed-specific vibrations - like shaking that occurs only between 50-60 mph - typically mean wheel or tire runout causing dynamic imbalance. Always check wheels first when diagnosing vibration, since bent rims can make perfectly good tires appear out-of-round.
Ready to keep your aftermarket wheels and tires performing like new? These proven maintenance techniques protect your investment while ensuring maximum safety and performance on every drive.
Consistency delivers results. Monthly pressure checks, regular rotations, and prompt attention to wear issues will keep your setup running smoothly for years. Our expert team is here to help when you need professional guidance or quality replacement parts.
Your aftermarket wheels represent more than just an upgrade - they're a statement about your commitment to quality and performance. Treat them right, and they'll reward you with exceptional service life and reliable performance mile after mile.
Master these essential maintenance practices to maximize the performance and lifespan of your aftermarket wheels and tires while ensuring optimal safety on the road.
• Check tire pressure monthly when tires are cold - most vehicles need 28-36 PSI, and pressure drops 1-2 PSI for every 10°F temperature decrease
• Rotate tires every 5,000-8,000 miles and replace when tread depth reaches 4/32" using the quarter test for optimal wet-weather performance
• Verify fitment specifications before installation: bolt pattern, hub bore, and offset must match your vehicle's requirements exactly
• Clean wheels weekly with pH-balanced cleaners and check lug nut torque (80-120 ft-lb) after 50-100 miles of driving
• Store spare tires indoors in airtight plastic bags and replace valve stems every 3-5 years or when installing new tires
Consistent maintenance prevents costly repairs and safety hazards. Set monthly inspection reminders and address vibrations or wear patterns immediately to keep your aftermarket setup performing at its peak for years to come.
Check your tire pressure monthly when the tires are cold (after the vehicle has been parked for at least three hours). Most vehicles require 28-36 PSI, and remember that tire pressure drops about 1-2 PSI for every 10°F decrease in temperature.
Replace your tires when the tread depth reaches 4/32" (use the quarter test with Washington's head) or when they reach 6 years old, regardless of mileage. Also replace them immediately if you notice sidewall cracks, bulges, or uneven wear patterns.
Rotate your tires every 5,000 to 8,000 miles to ensure even wear. Front tires typically wear faster on front-wheel-drive vehicles due to steering and power delivery demands, making regular rotation especially important.
Wash your aftermarket wheels every 1-2 weeks using mild soap and water with a dedicated wash mitt. Use pH-balanced cleaners (pH 6-8) that work safely on all wheel finishes, and avoid acidic cleaners on bare aluminum, polished, or anodized finishes.
Replace valve stems when installing new tires or every 3-5 years if you drive long distances frequently. Inspect them regularly for cracks, tears, or dry rot. You can test for leaks by spraying a soap and water mixture on the stem—air bubbles indicate a leak.