Improper lug nut torque ranks among the most dangerous yet preventable vehicle maintenance mistakes. When lug nuts aren't tightened to the correct specification, wheels can wobble dangerously or detach completely from your vehicle.
At Performance Plus Tire, we see this problem more often than we'd like to admit. Vehicles arrive at our shop with lug nuts that are either over-tightened to the point of stud damage or so loose they're barely holding the wheel in place. Both situations create serious safety hazards that put drivers and passengers at risk. Proper lug nut installation requires the right tools, correct torque specifications, and a specific tightening pattern to ensure your wheels stay securely attached.
The job doesn't end with initial installation, either. New wheels need to be re-torqued after your first 50 to 100 miles of driving. This follow-up step accounts for the natural settling that occurs as wheel components compress under normal driving conditions.
We'll show you the exact techniques professional mechanics use to torque lug nuts correctly every time. Whether you're mounting a fresh set of custom wheels or performing routine tire maintenance, these proven methods will help you achieve perfect torque specifications while keeping safety as the top priority. Your wheels depend on those threaded fasteners to do their job properly – and your safety depends on getting the torque right.
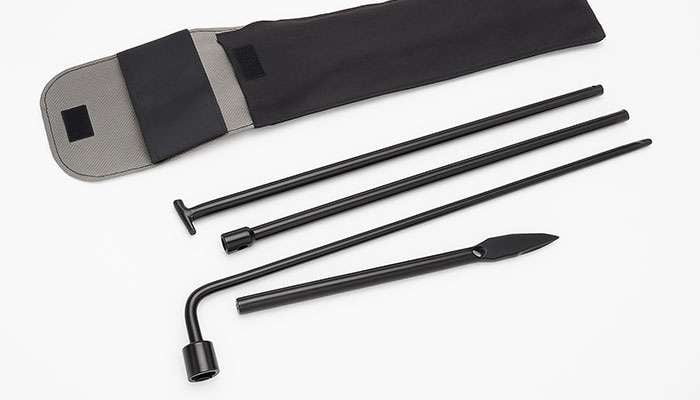
Getting the right tools makes all the difference between a successful lug nut installation and a potentially dangerous situation. The most important tool you'll need is a quality torque wrench, available at most auto parts stores for under $40. This investment pays for itself the first time you avoid wheel-related problems. You'll also need a standard lug wrench or breaker bar for initial loosening, properly sized sockets that match your lug nuts, and a reliable jack with jack stands for safe vehicle lifting.
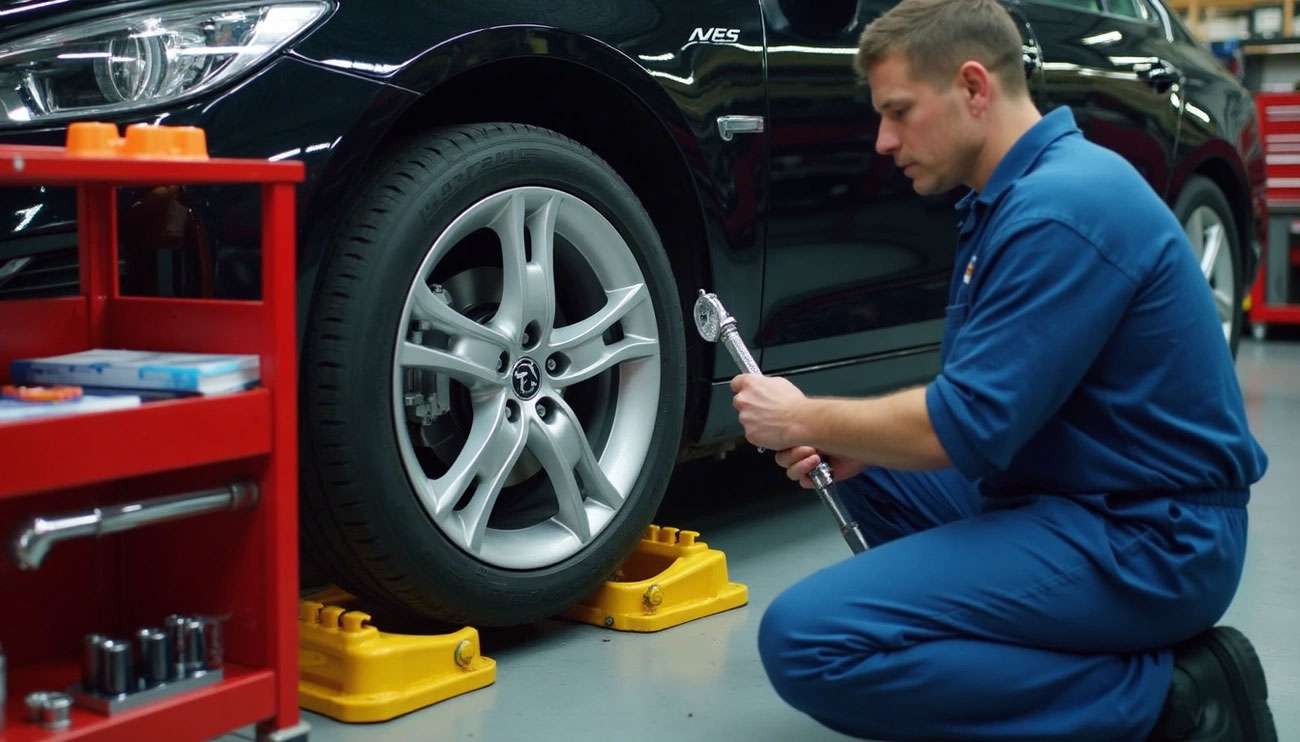
Safety preparation requires attention to detail before you even touch a lug nut. Start by parking on level, solid ground – never attempt this work on an incline or soft surface. Engage your parking brake firmly and shift into Park for automatic transmissions or first gear for manual transmissions. Wheel chocks placed behind the tires remaining on the ground provide additional security against unexpected vehicle movement.
The torque specification for your specific vehicle is critical information you'll find in your owner's manual. Different vehicles require different torque values, making this step essential for proper wheel installation. Keep this specification handy throughout the process.
When you're ready to lift the vehicle, locate the proper jacking points specified in your owner's manual. Use your jack to raise the vehicle until the wheel clears the ground, then immediately secure it with jack stands. Never work under a vehicle supported only by a jack – jack stands provide the stable support you need for safe lug nut service.
With your vehicle properly secured and lifted, the actual torquing process begins with thorough preparation. Clean all threads and contact surfaces completely. Use a wire brush to remove rust, dirt, or debris from the wheel hub and lug nuts. This cleaning step ensures proper thread engagement and prevents corrosion from affecting future wheel removal.
Position the wheel onto the hub, carefully aligning each hole with its corresponding wheel stud. Thread each lug nut by hand until finger-tight. Hand-threading prevents cross-threading damage and ensures each nut starts properly on its stud before applying torque.
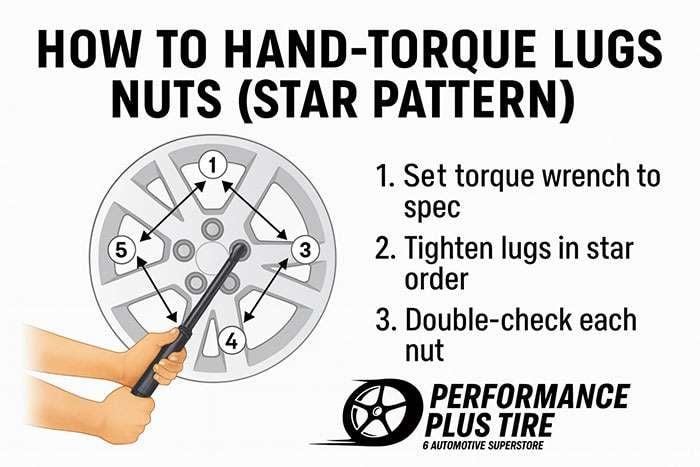
Set your torque wrench to the manufacturer's specification found in your owner's manual. Tighten the lug nuts using a star or crisscross pattern. On a five-lug wheel, start at the top position, then move to the bottom right, top left, bottom left, and finally the right position. This sequence distributes clamping force evenly across the wheel face, preventing warping and ensuring uniform contact.
Keep the threads dry during installation. Torque specifications assume dry, unlubricated threads. Oil or grease changes the friction coefficient and can result in over-tightening that damages studs or under-clamping that allows loosening.
Complete one full sequence in the star pattern, then repeat the entire process to verify each lug nut reaches the specified torque value. Lower the vehicle completely before performing your final torque check with the wheel bearing full vehicle weight.
Schedule a re-torque after driving 50-100 miles. Metal compression and thermal cycling during the break-in period can affect initial clamping force, making this follow-up essential for long-term wheel security.
Your lug nut maintenance doesn't stop once you've completed the initial torquing process. Re-torquing stands as one of the most critical yet commonly skipped steps in wheel installation. Once you've driven approximately 50-100 miles on newly installed wheels, you must check and re-torque the lug nuts to manufacturer's specifications. This happens because driving creates physical forces that affect your wheel assembly in ways that aren't immediately apparent.
Metal components compress slightly as they settle into their final positions under real-world conditions. The combination of wheel rotation, vehicle weight, and road impacts all contribute to this natural settling process. Temperature changes from driving also cause expansion and contraction of metal parts, while road debris can work its way between studs and lug nuts, creating microscopic gaps. Each of these factors can gradually loosen your lug nuts over time.
Keep an eye out for these warning signs that indicate improperly torqued lug nuts:
Vibrations in the steering wheel or vehicle body
Uneven tire tread wear
Rattling or clicking sounds from the wheels
The consequences of incorrect torque create problems on both ends of the spectrum. Under-torqued lug nuts put you at risk of wheel detachment, while over-torqued ones can damage threads, stretch wheel studs, or even warp brake rotors. We recommend making regular torque checks part of your standard maintenance routine, particularly after any service work that involves wheel removal.
Always perform these checks when your wheels are at ambient temperature – never when they're hot from driving. This simple precaution ensures accurate torque readings and helps maintain the safety and longevity of your wheel assembly.
Lug nut torque represents one of those critical maintenance tasks that separates professional-level vehicle care from amateur guesswork. The techniques we've outlined here aren't complicated, but they require the right approach and tools to execute properly. A quality torque wrench becomes an essential part of your toolkit when you consider what's at stake.
The star pattern tightening sequence distributes load evenly across your wheel assembly, preventing the warping and uneven stress that leads to premature failure. Clean threads ensure accurate torque readings and prevent the corrosion buildup that can cause problems down the road.
That 50-100 mile re-check isn't optional—it's when you catch the settling and compression that naturally occurs with new installations. Components need time to find their final positions under real driving conditions.
Watch for the warning signs we mentioned: steering vibrations, uneven tire wear, and unusual wheel noises. These symptoms tell you something's wrong before it becomes dangerous. Regular torque checks should become as routine as checking your tire pressure, especially after any wheel service.
Your vehicle's wheels connect to the road through those threaded fasteners. Getting the torque specification right ensures that connection stays solid mile after mile. The few minutes spent with proper torque technique protects both your investment and your safety on every drive.
Master these essential lug nut torquing techniques to ensure your wheels stay securely attached and prevent dangerous wheel detachment while driving.
• Always use a torque wrench set to manufacturer specifications and tighten lug nuts in a star pattern to distribute pressure evenly across the wheel.
• Re-torque lug nuts after driving 50-100 miles on newly installed wheels, as metal components settle and thermal stresses can cause loosening.
• Clean all threads and contact surfaces before installation, and never lubricate threads as this affects torque accuracy and can lead to over-tightening.
• Perform final torque checks with the vehicle lowered and wheels at ambient temperature to ensure accurate readings and proper wheel security.
• Watch for warning signs like steering vibrations, uneven tire wear, or unusual noises that indicate improperly torqued lug nuts requiring immediate attention.
Proper lug nut torquing isn't just about following steps—it's about creating a reliable connection between your wheels and vehicle that protects you and your passengers on every journey.
Proper torquing of lug nuts is crucial for safety. Incorrectly tightened lug nuts can lead to wheel wobbling or even complete detachment from your vehicle while driving, which can be extremely dangerous.
You'll need a torque wrench, lug wrench or breaker bar, appropriate sockets that fit your lug nuts, and a jack with jack stands. A torque wrench is the most essential tool and can be purchased for under $40 at most auto parts stores.
The correct torque specification can be found in your vehicle's owner's manual. It's crucial to use the exact specification for your specific vehicle, as requirements can vary between different makes and models.
Tighten the lug nuts in a star or crisscross pattern using a torque wrench set to your vehicle's specifications. Start with hand-tightening, then use the torque wrench to achieve the proper torque. Repeat the pattern to verify all nuts are correctly tightened.
Yes, it's critical to re-torque your lug nuts after driving 50-100 miles on newly installed wheels. This accounts for any settling of metal components or thermal stresses that may have affected the wheel assembly during the initial break-in period.