Les Schwab fixes almost 2-million flat tires every year — often at no charge. Flat tires are one of the most common road emergencies that nearly every driver faces at some point.
You have several options when dealing with a flat tire. Tire sealants offer a quick temporary fix, lasting about 3 days or 100 miles, whichever comes first. A properly installed tire plug can last up to 10 years or 25,000 miles, which makes learning proper tire repair techniques essential for any vehicle owner.
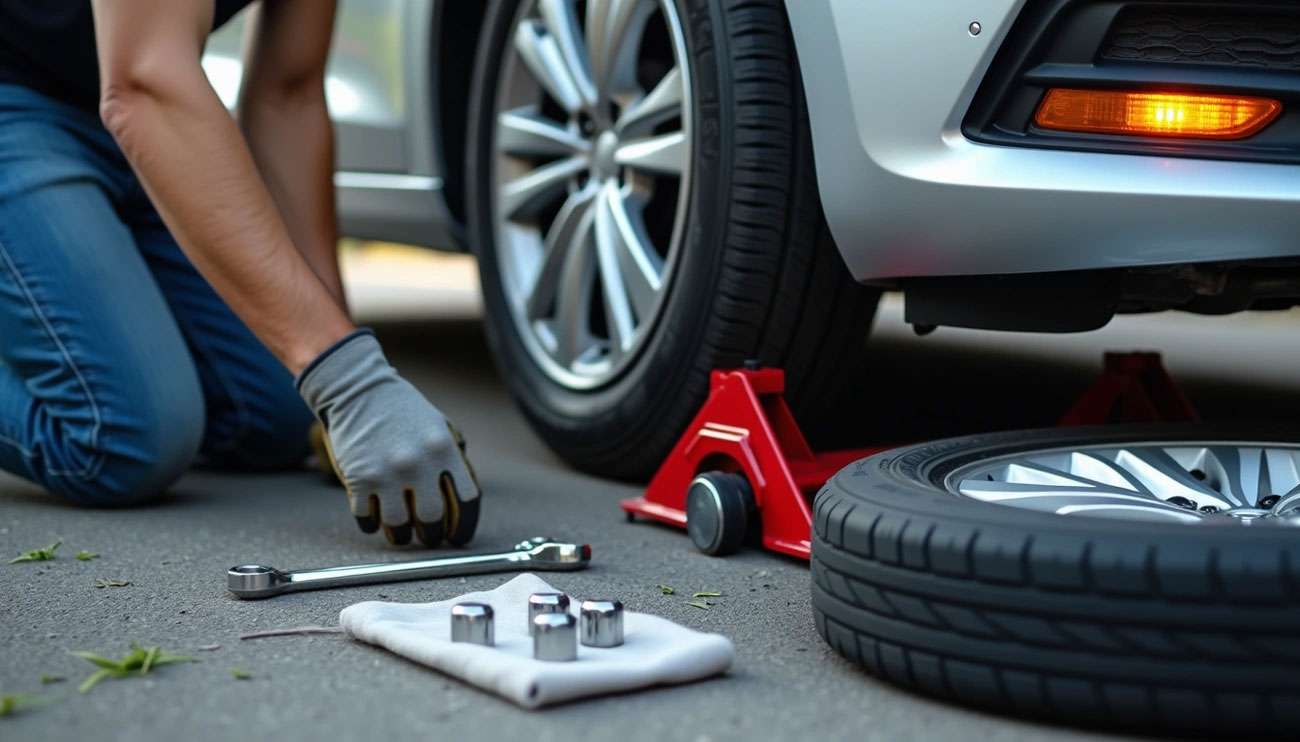
Fixing a flat tire yourself requires no professional training. With the right tools and knowledge, you can fix a flat tire at home or on the roadside in just 15 minutes. Whether you're using a spare tire or a repair kit, mastering this step-by-step process saves you time, money, and eliminates the frustration of waiting for roadside assistance.
Not every flat tire can be repaired safely. Tire experts specify that punctures must be smaller than a quarter inch (6 mm) and located in the tread area — never on the shoulder or sidewall. Understanding these guidelines ensures you make the right decision for your safety and get back on the road quickly.
Proper preparation is the foundation of safe tire repair. Your safety depends on both finding the right location and having the correct equipment ready before you start.
Finding the right spot to change your tire makes the difference between a routine repair and a dangerous situation. When you notice a flat tire while driving, stay calm and avoid sudden stops. Maintain control and look for an appropriate place to pull over.
Parking lots provide the best environment for tire changes. They offer flat, stable surfaces with solid ground and plenty of space to work safely. Never attempt to change a tire on grass or soft dirt — these surfaces can cause your jack to sink or become unstable, creating serious safety hazards.
Highway situations require extra caution. Drive slowly with hazards flashing until you reach a wide shoulder or exit. Driving a short distance on a flat tire is better than attempting a repair in a dangerous location. Choose straight road sections over curves where other drivers have better visibility of your vehicle.
Turn on your hazard lights immediately after parking, even during daylight hours. These flashing lights alert other drivers that your vehicle is disabled and needs extra clearance space.
Secure your vehicle with the parking brake. This critical step prevents rolling while you work on the tire. Put automatic transmissions in "Park" and manual transmissions in first gear or reverse for additional security.
Place wheel chocks or heavy objects like rocks on both sides of the wheels diagonally opposite to the flat tire. This extra precaution provides another layer of security, especially on slight inclines.
You need these fundamental tools for any tire repair:
Jack: Lifts your vehicle off the ground. Most cars include a scissor jack, though floor jacks offer better stability if you have trunk space. Position the jack only at designated jack points shown in your owner's manual to prevent vehicle damage.
Lug wrench: Removes the lug nuts that secure your wheel. Some wrenches include extension bars that provide extra leverage for stubborn nuts.
Spare tire: Check inflation regularly. Nothing creates more frustration than discovering your spare is flat when you need it most.
Gloves: Protect your hands from dirt, grease, and potential injuries while handling tools and tires.
These additional items make tire changing much easier:
Flashlight with extra batteries for nighttime emergencies
Tire pressure gage to verify your spare's inflation
Wheel wedges for additional stability
Breaker bar for extremely tight lug nuts
Portable tire inflator for proper pressure maintenance
Rain poncho for weather protection
Reflective triangles or road flares for better visibility
We recommend storing these tools in a dedicated tire-changing kit in your trunk. Review your owner's manual to understand your vehicle's specific requirements, as some cars need specialized tools like wheel lock adapters.
Proper preparation ensures you can handle flat tire emergencies safely and efficiently. When you take time to organize the right tools and understand your equipment, you set yourself up for success in the actual repair process.
You're prepared and ready to get back on the road. This entire tire changing process takes 15 minutes or less with practice, turning a roadside emergency into a minor inconvenience.
Start by loosening the lug nuts while the tire remains on the ground. This step uses the tire's contact with the pavement to provide resistance, making it much easier to break the tight seal. Place your lug wrench on each nut and turn counterclockwise with firm pressure.
Stubborn lug nuts require a different approach. Position the wrench at the "10 o'clock" position and push down using your body weight rather than pulling, then repeat once the arm reaches "6 o'clock". This leverage technique works far better than trying to turn the wrench continuously. You're only loosening at this stage — complete removal comes later.
Position your jack at the designated jack points specified in your owner's manual — typically found on the frame near each wheel. Incorrect jack placement risks vehicle damage or dangerous slipping. Slowly raise the vehicle until the flat tire sits approximately 6 inches off the ground.
Keep the jack perfectly straight throughout this process. Any tilting means you need to lower the vehicle and reposition immediately. Never work underneath a vehicle supported only by a jack.
With the car safely elevated, completely remove all lug nuts. Store them in your hubcap to prevent losing them. Pull the flat tire straight toward you to remove it from the wheel studs. Stuck tires due to rust or corrosion may need gentle rocking motion to break free.
Align your spare tire with the wheel studs, ensuring the valve stem faces outward. Push the tire fully onto the wheel hub until it seats completely. Thread the lug nuts by hand, turning clockwise until finger-tight. This hand-tightening prevents cross-threading and ensures proper alignment.
Give the finger-tight lug nuts preliminary tightening with your wrench — just enough to secure the wheel. The critical step here is tightening in a star or crisscross pattern. This technique centers the wheel properly on the hub and distributes pressure evenly, preventing warping of both the wheel and brake rotor.
Lower the vehicle gradually until the tire contacts the ground but carries only partial weight. Tighten the lug nuts more firmly at this point, maintaining the star pattern. Once the car is fully lowered and the jack removed, use your full body weight to give each lug nut final tightening, continuing with the star pattern.
Check and retighten your lug nuts after 30-50 miles of driving. Wheels sometimes settle after installation, causing slight loosening that needs attention.
Finding yourself with a flat tire and no spare doesn't have to end your day. Alternative solutions can get you back on the road when you're stuck at home without a replacement wheel.
A tire plug kit provides an effective temporary solution for punctured tires. These kits include several essential components:
Plugs (sticky rubber cords)
T-handle reamer tool
T-handle insertion tool
Rubber cement
Here's how to fix your flat tire using a plug kit:
Locate the puncture and remove any objects (like nails) using pliers.
Insert the reamer tool into the hole, working it in and out to clean and roughen the puncture.
Thread a plug through the eyelet of the insertion tool, similar to threading a needle.
Apply rubber cement to the plug for better adhesion.
Push the insertion tool firmly into the hole until approximately 1/2 inch of the plug remains visible.
Remove the tool with a quick pull, leaving the plug in place.
Trim excess plug material, leaving about 1/8-inch protruding.
Inflate the tire and check for leaks.
Properly installed plugs can last for hundreds of miles or even years, depending on the puncture type and installation quality.
Tire sealant sprays offer an even quicker fix for flat tires. These products come in aerosol cans containing foam or liquid sealant plus compressed air.
The process is straightforward:
Remove any objects causing the puncture.
Position the tire with the valve stem at the top.
Connect the sealant can's nozzle to the valve stem.
Press the button to release the sealant into the tire.
Drive briefly to distribute the sealant evenly inside.
You'll typically need to add more air with a tire inflator since most sealants provide minimal inflation.
Choose a plug kit when:
You're dealing with a small puncture (under 1/4 inch or 6mm)
You need a longer-lasting temporary fix
You have time for a more involved repair process
Opt for sealant spray when:
You need the quickest possible solution
The puncture is very small
You lack technical skills for plugging
Neither method works for:
Sidewall damage (always requires professional repair)
Large holes exceeding 1/4 inch
Multiple punctures in one tire
Both solutions are temporary fixes. Tire sealants typically last up to 100 miles, while plugs may last considerably longer but aren't permanent repairs. Visit a tire shop promptly after using either method for professional assessment and proper repair.
Understanding your limits is just as important as knowing repair techniques. Some tire damage requires professional replacement, not repair.
The sidewall is the weakest part of your tire. Any punctures, cuts, or damage on or near the sidewall cannot be repaired safely. The sidewall lacks the cord reinforcement found in the tread area, making any repair attempt dangerous. Bubbles or bulges in the sidewall indicate broken internal cords, which creates serious risk of catastrophic tire failure.
We established earlier that punctures must be smaller than ¼-inch (6mm) in diameter. This industry standard exists because larger holes compromise the tire's structural integrity beyond what plugs or patches can restore safely. Repairs work only in the center tread area. Even professional tire repair facilities follow these strict guidelines to prevent safety risks.
Tires with existing repairs need careful evaluation before adding more. Multiple repairs that overlap or sit directly across from each other cannot be fixed safely. Most tire shops recommend against patching a tire more than twice. Each repair weakens the tire structure, eventually compromising its overall integrity and performance.
When you encounter these situations, tire replacement is your only safe option. Professional assistance costs more upfront but prevents dangerous blowouts and expensive damage down the road.
Preventing flat tires saves you more time, money, and hassle than any repair technique. These simple maintenance habits can significantly reduce your chances of dealing with that dreaded roadside emergency.
Proper tire pressure is your strongest defense against flat tires. Experts recommend checking your tire pressure at least once a month. Underinflated tires can lower your fuel economy by up to 3%, increase wear, and potentially lead to tire failure. Tire pressure changes about 1 PSI for every 10-degree temperature fluctuation. Always check pressure when tires are "cold" after the car has been parked for several hours.
Road shoulders are notorious for harboring nails, screws, and metal debris that puncture your tread. Construction zones present even greater hazards, with scattered hardware and sharp objects everywhere. Watch for potholes as well — hitting one at speed can damage wheels, alignment, and tires. Scan the road ahead and drive cautiously through areas with visible debris.
Most manufacturers recommend rotating your tires approximately every 5,000-8,000 miles. This practice distributes wear evenly across all four tires, maximizing their lifespan and maintaining consistent traction. Schedule rotation during oil changes for a simple reminder system.
Exceeding your vehicle's weight capacity puts dangerous stress on your tires. Overloading creates excessive heat buildup in the sidewalls, making them flex abnormally. This increases friction and rolling resistance, potentially leading to blowouts. Check your owner's manual for weight limits and distribute cargo evenly throughout the vehicle.
Flat tires happen to nearly every driver, but they don't have to ruin your day. You now have the knowledge and tools to handle this common emergency in just 15 minutes. Safety remains your top priority — always find a stable location away from traffic, turn on those hazard lights, and secure your vehicle before starting any repair work.
Some flat tires require professional attention. Sidewall damage, large punctures, and multiple repairs need expert intervention to keep you safe on the road.
The step-by-step process we've covered makes tire changing straightforward. From loosening lug nuts to that final tightening in the star pattern, each step builds your confidence. Tire plug kits and sealant sprays provide excellent backup options when you don't have a spare tire available.
Prevention beats any repair technique. Monthly pressure checks, avoiding debris-filled areas, regular tire rotation, and respecting your vehicle's weight limits will keep your tires performing longer.
The next time you hear that flapping sound or feel your car pulling to one side, you'll handle the situation with confidence instead of panic. This essential skill saves you time, money, and stress while keeping your passengers safe. Your journey continues with minimal interruption, no matter what the road brings your way.
Master these essential flat tire repair skills to handle roadside emergencies confidently and get back on the road in just 15 minutes.
• Safety first: Find a flat, stable surface away from traffic, turn on hazard lights, and apply the parking brake before starting any tire repair work.
• Follow the star pattern: Always tighten lug nuts in a crisscross pattern to ensure even pressure distribution and prevent wheel warping or damage.
• Know your limits: Never attempt repairs on sidewall damage, punctures larger than ¼-inch, or multiple overlapping repairs—these require professional replacement.
• Prevention beats repair: Check tire pressure monthly, avoid construction zones and road shoulders, and rotate tires every 6,000 miles to prevent future flats.
• Alternative solutions exist: When lacking a spare, tire plug kits offer longer-lasting repairs while sealant sprays provide quick temporary fixes for small punctures.
With proper preparation and these techniques, you'll transform from helpless motorist to confident problem-solver, saving both time and money while ensuring your safety on the road.
With the right tools and knowledge, you can change a flat tire in about 15 minutes. This includes safely pulling over, jacking up the car, removing the flat tire, installing the spare, and tightening the lug nuts properly.
The most crucial safety measure is finding a flat, stable surface away from traffic. Turn on your hazard lights, apply the parking brake, and use wheel chocks if available. Never change a tire on an unstable surface or in a dangerous location.
If necessary, you can drive slowly for a short distance on a flat tire to reach a safer location. It's better to potentially damage the rim than risk changing the tire in a dangerous spot. Drive at a very low speed with your hazard lights on.
If you don't have a spare, you can use a tire plug kit for small punctures (under 1/4 inch) in the tread area. For a quicker temporary fix, you can use a tire sealant spray. Both methods are temporary solutions, and you should get the tire professionally inspected as soon as possible.
Experts recommend checking your tire pressure at least once a month. Proper tire inflation helps prevent premature wear and potential blowouts. Remember that tire pressure can change with temperature fluctuations, so it's best to check when the tires are "cold" after the car has been parked for several hours.